Amigurumi for Absolute Beginners: Your First Stuffed Animal
by Crochets Studio — Written by a crochets.ca contributor who keeps a basket of half-finished amigurumi by the couch and firmly believes every stuffed animal deserves slightly wonky first-try ears.
Amigurumi looks intricate, but almost every crocheted animal you've admired online is built from just two skills: single crochet worked in a spiral, and simple increases and decreases to shape each piece. Master those two things, plus a firm stuffing hand, and you can make nearly any amigurumi pattern out there. Here's everything you need to finish your very first one.
Amigurumi looks intricate, but almost every crocheted animal you've admired online is built from just two skills: single crochet worked in a spiral, and simple increases and decreases to shape the pieces. Once you can do those two things and stuff a shape without lumps or gaps, you're ready for almost any amigurumi pattern. This guide walks through the materials, the stitches, and the exact steps to finish your first little stuffed friend.
What Is Amigurumi, Exactly?
Amigurumi comes from the Japanese words ami (crocheted or knitted) and nuigurumi (stuffed doll). It refers to small, rounded crocheted creatures, usually worked in continuous spirals rather than flat rows, then stuffed and assembled into a finished toy. It's genuinely one of the friendliest places to start in crochet: pieces are small, mistakes are easy to unravel, and the whole project fits in your lap.
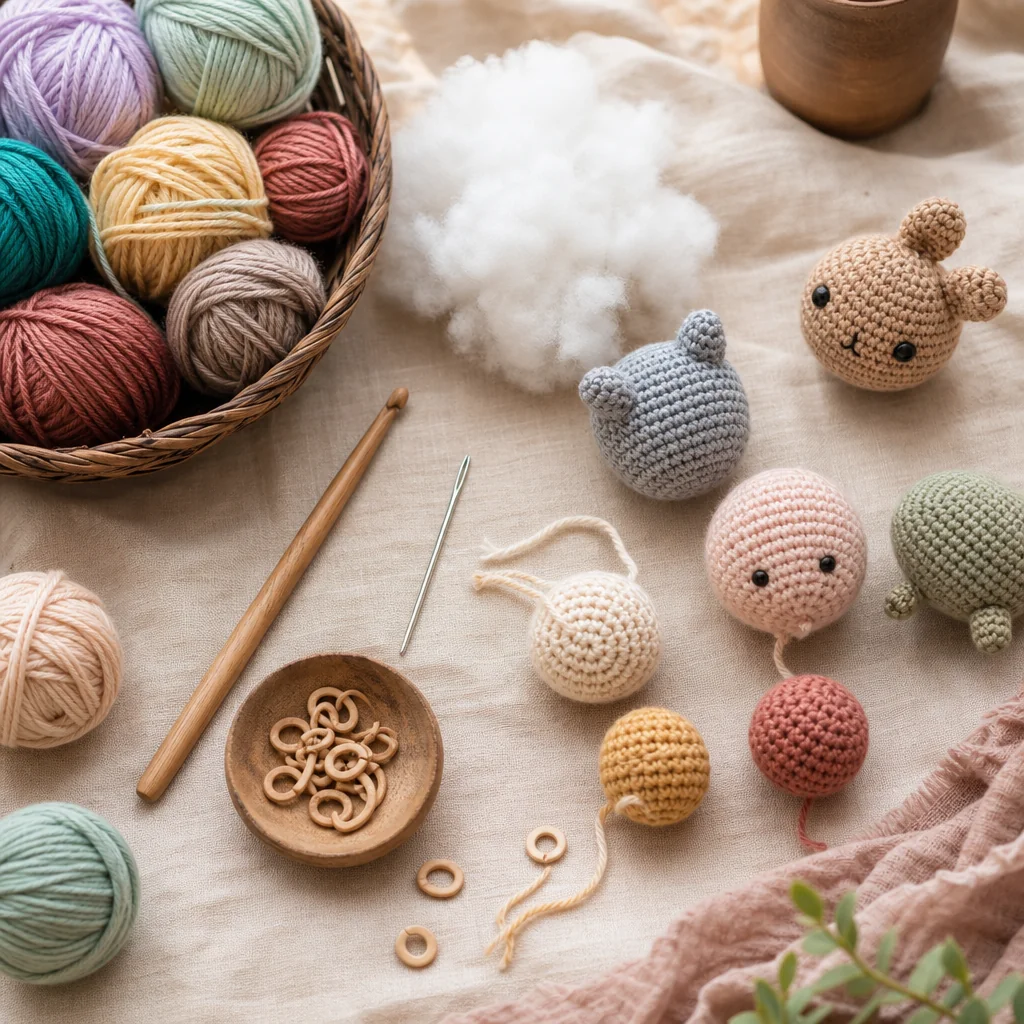
What You'll Need
- A small crochet hook, usually 3.0–4.0 mm
- Worsted weight (medium/#4) yarn in your favourite colour, plus a small amount of a contrasting shade for the face
- Polyester fiberfill stuffing
- A yarn needle for sewing pieces together and weaving in ends
- Stitch markers (a bobby pin or scrap of yarn works fine)
- Safety eyes or embroidery thread for the face
- Sharp scissors
A Note on Hook and Yarn Size
Amigurumi patterns almost always call for a hook one or two sizes smaller than what the yarn label recommends. Going smaller keeps your stitches tight and close together, which is exactly what stops the white fluff of your stuffing from peeking through the fabric.
The Only Two Skills You Need
Single Crochet in a Spiral
Most amigurumi is worked entirely in single crochet, round after round, without joining or turning. Instead of slip stitching to close each round the way you would for a flat motif, you just keep crocheting into the next stitch, spiraling upward. Drop a stitch marker into the first stitch of each round and move it up as you go, so you always know where a round started.
Increasing and Decreasing
An increase (inc) is simply two single crochets worked into the same stitch, which adds a stitch and widens the piece. A decrease (dec, often written sc2tog) combines two stitches into one, narrowing the piece. Rounds of plain single crochet, with no increasing or decreasing, keep the piece the same width. Combining these three moves is how every amigurumi head, body, and limb gets its shape.
How to Crochet Your First Amigurumi Shape
Before tackling a full animal, practice the shaping on a simple ball. This is the exact shape used for heads, bodies, and even simple fruit or berry amigurumi, so it's worth getting comfortable with it first.
- Make a magic ring (an adjustable loop) and single crochet 6 stitches into it. Pull the ring closed. (6 stitches)
- Round 2: Increase in every stitch around. (12 stitches)
- Round 3: Single crochet 1, increase repeated 6 times. (18 stitches)
- Round 4: Single crochet 2, increase repeated 6 times. (24 stitches)
- Rounds 5–9: Single crochet evenly around with no shaping, keeping the stitch count at 24. This builds the body of the ball.
- Round 10: Single crochet 2, decrease repeated 6 times. (18 stitches)
- Round 11: Single crochet 1, decrease repeated 6 times. (12 stitches)
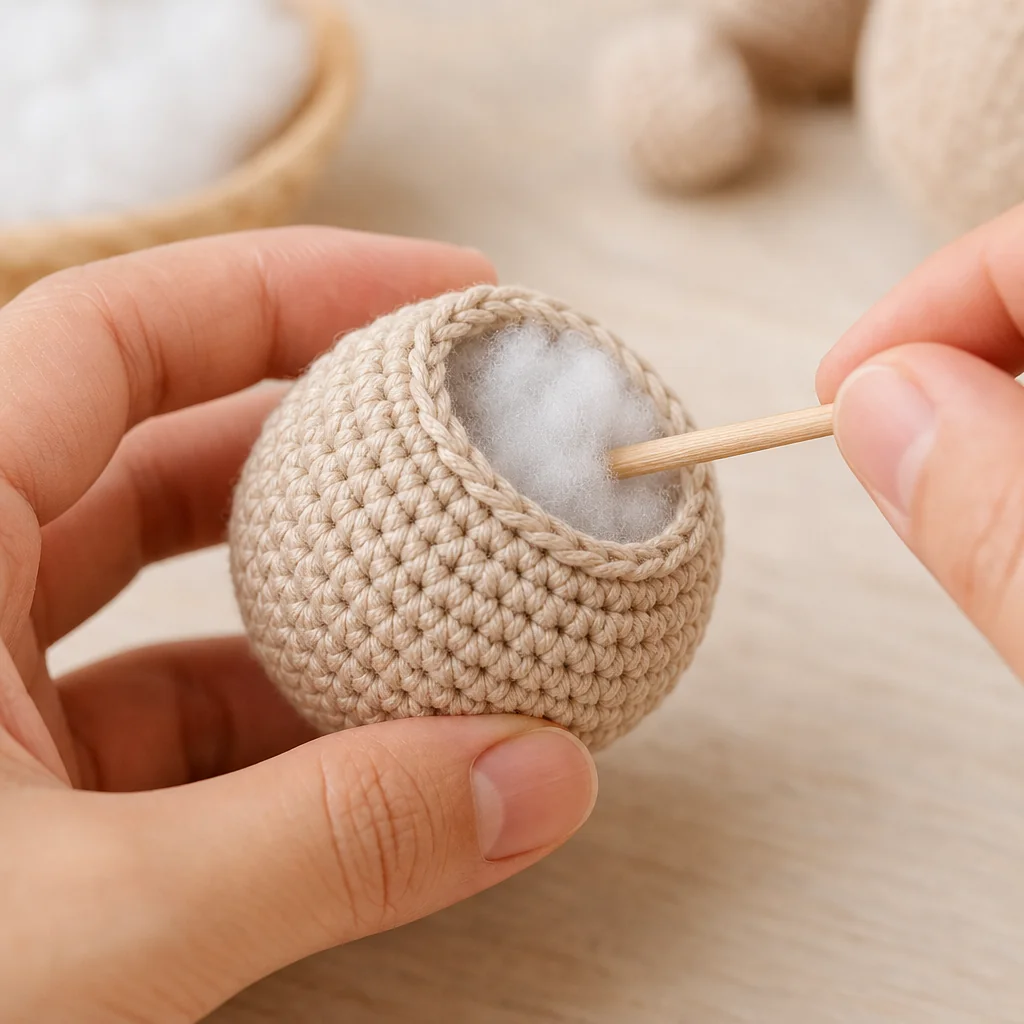
- Begin stuffing the ball firmly through the opening, pushing fiberfill into every edge with your fingers or the end of a pencil.
- Round 12: Decrease around until the opening is small. (6 stitches)
- Cut the yarn leaving a long tail, thread it onto your yarn needle, weave through the front loops of the remaining stitches, pull tight to close, and weave the tail inside to secure.
That closed, stuffed ball is your first finished amigurumi shape, and the foundation for heads, bodies, cheeks, and dozens of animal patterns.
Common Beginner Hiccups
Problem: Stuffing shows through gaps in the fabric
Cause: Your hook is too large for the yarn, or your tension is loose, leaving space between stitches.
Fix: Drop down a hook size and consciously pull each stitch a little snugger. Tight, even tension is the single biggest factor in a clean-looking amigurumi.
Problem: The shape looks lopsided or lumpy
Cause: A missed increase or decrease threw off your stitch count partway through a round.
Fix: Count your stitches at the end of every round while you're learning. It only takes a few seconds and saves you from unraveling several rounds later.
Problem: You lose track of where the round started
Cause: Working in a spiral means there's no slip stitch marking the start, so it's easy to drift.
Fix: Always keep a stitch marker in the first stitch of the round and move it up one stitch every round without fail.
Tips for a Smooth First Project
- Stuff a little more firmly than feels natural. Amigurumi should feel dense and hold its shape when squeezed.
- Add stuffing gradually as you crochet the final rounds, rather than trying to cram it all in at the very end.
- Weave in ends as you finish each piece instead of saving them all for last; it keeps the project manageable.
- Pin pieces in place with stitch markers or safety pins before sewing them on permanently, so you can adjust the placement of eyes, ears, or limbs first.
- Work in good light. Amigurumi stitches are small and dense, and it's much easier to spot a missed increase when you can actually see your work clearly.
Ready to Crochet Your First Animal?
You now know every technique behind a huge share of amigurumi patterns: spiral single crochet, increases, decreases, and firm stuffing. The next step is picking a pattern sized for a beginner, ideally one worked mostly in plain rounds with just a few shaping rows.
Browse our collection of beginner-friendly amigurumi patterns on crochets.ca and pick your first project today. Your little crocheted friend is just a few rounds away.
Next step
Browse beginner amigurumi patterns