How to Make a Slip Knot and Your First Chain Stitch
by Crochets Studio — I'm a crochet designer and educator with over a decade of experience translating complex stitches into approachable, joyful projects. I believe every person has a crocheter inside them waiting to emerge.
The slip knot and chain stitch are the gateway to crochet. These two foundational techniques are simpler than they appear and form the basis for every single project you'll ever make. By understanding these essentials, you're already on your way to creating beautiful handmade pieces.
Getting Started: The Foundation of Crochet
Whether you're picking up a crochet hook for the very first time or returning after years away, the slip knot and chain stitch are where every single project begins. These two techniques might seem small, but they're absolutely essential—and they're far simpler than you might imagine. Once you've practiced them a few times, your hands will remember the motions, and you'll be ready to build on these foundations.
The beauty of crochet is that it's forgiving and fun. If your first attempts aren't perfect, that's completely normal and expected. Every experienced crocheter started exactly where you are now, with wobbly chains and shaky tension. The good news? This is something that gets better with every single stitch you create.
Materials You'll Need
- Yarn: Choose a light-coloured, medium-weight yarn (worsted weight) for your first attempts. Lighter colours make it easier to see your stitches, and medium weight is forgiving without being too bulky. Avoid dark yarns, novelty yarns, or anything with texture—save those for when you've built confidence.
- Crochet hook: Start with a size appropriate to your yarn (the label will recommend a hook size). For practice purposes, a 5.5mm to 6mm hook works well for most beginner yarns.
- Scissors: For cutting your yarn cleanly when you're finished.
- Patience and positive energy: You've got this!
Step-by-Step: Creating Your Slip Knot
The slip knot is your anchor point—it's what holds your yarn on your hook and keeps everything stable as you begin. Don't let the name intimidate you; it's just a simple knot.
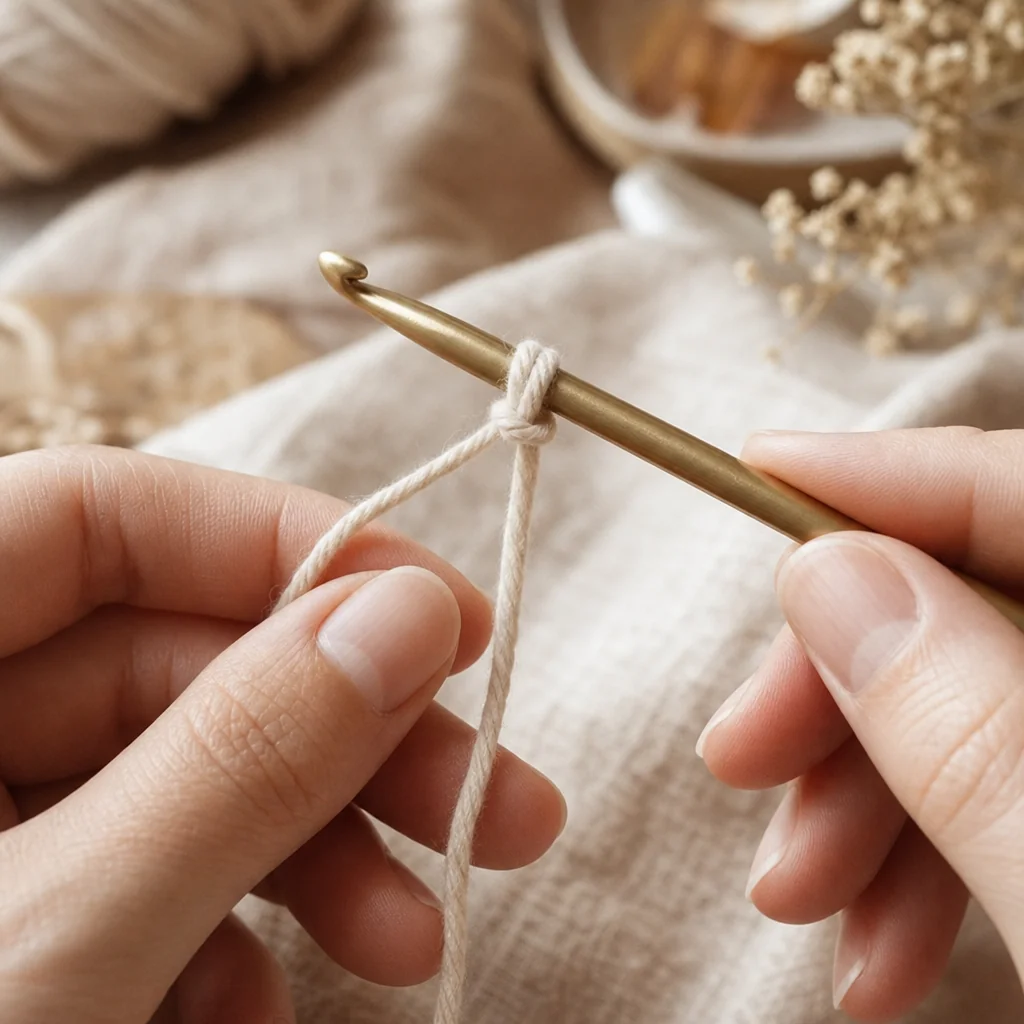
Step 1: Create the loop Take your yarn and make a loop, crossing the working yarn (the yarn attached to your ball) over the yarn tail. You should have a simple loop that looks a bit like a pretzel.
Step 2: Leave your tail Make sure you have about 6 inches of yarn tail hanging loose. This tail is important—you'll weave it in later to finish your project. Don't make it too short, or you'll have trouble working with it later.
Step 3: Insert your hook Slip your crochet hook through the loop you've created, coming from the front and going through from the back. Your hook should be inside the loop.
Step 4: Catch the working yarn With your hook inside the loop, reach for the working yarn (the part connected to your ball) and catch it on your hook. In crochet terms, this action is called a "yarn over."
Step 5: Pull through Gently pull the working yarn through the loop. You now have a new loop on your hook, and the original loop has tightened around it.
Step 6: Tighten gently Pull on both the working yarn and the tail to tighten your slip knot. You want it snug—firm enough that it won't slide off your hook, but not so tight that you can't move it at all. Think of it as "firm handshake" tight, not "tournament armwrestler" tight.
Congratulations! You've made your first slip knot. This is literally the starting point for every crochet project that exists.
Step-by-Step: Your First Chain Stitch
Once your slip knot is secure on your hook, you're ready to make chain stitches. The chain stitch is the most basic stitch in crochet, and every other stitch you'll ever learn builds from it. The chain creates your foundation row—the base upon which your entire project is built.
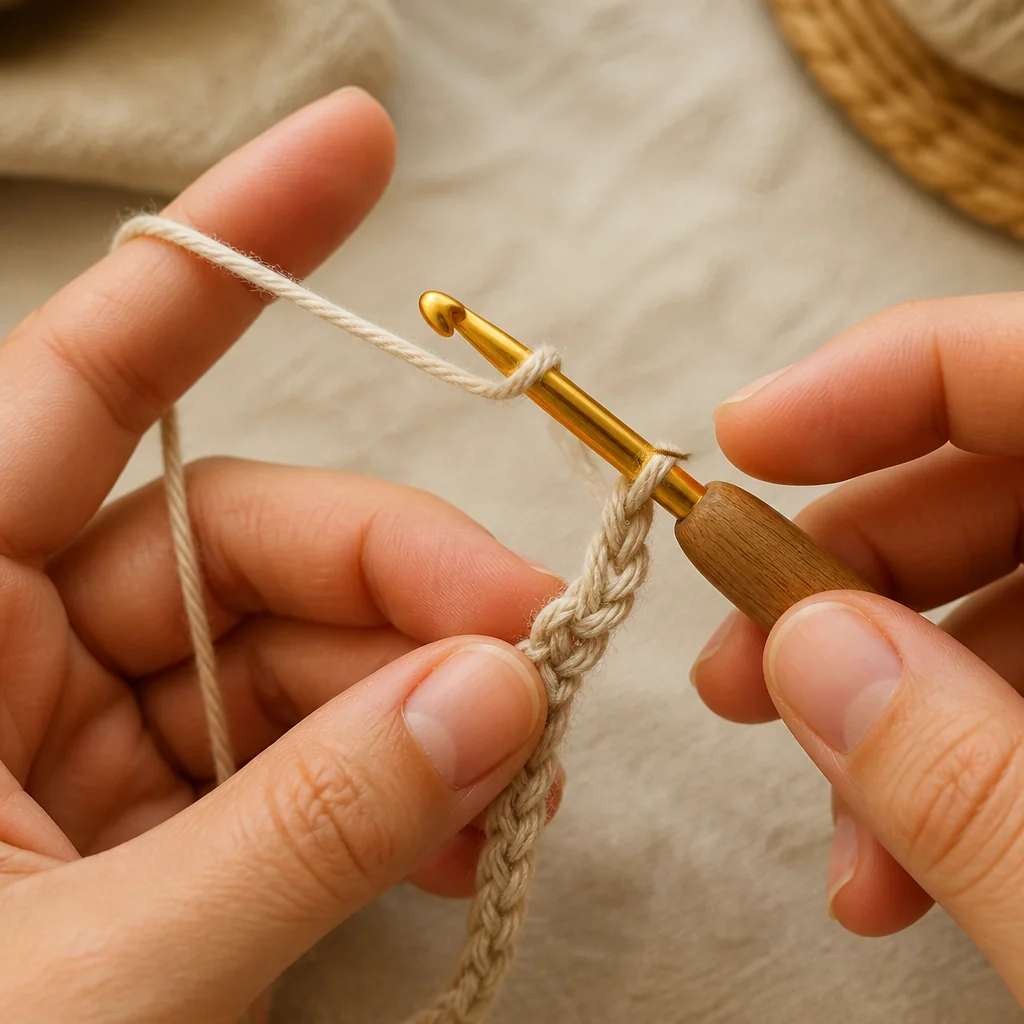
Step 1: Position your yarn With your slip knot on the hook, hold the working yarn loosely in your non-hook hand. Some people drape it over their index finger, others hold it between their fingers—there's no "right" way. Find what feels comfortable.
Step 2: Make a yarn over Bring the working yarn up and over your hook from back to front. This motion is called a "yarn over." You should hear a tiny whoosh as the yarn wraps around the hook.
Step 3: Pull through Using your hook, pull the working yarn through the loop that's already sitting on your hook. You now have a new loop on your hook. That new loop is your first chain stitch.
Step 4: Repeat Yarn over, pull through. Yarn over, pull through. Keep repeating this simple two-step motion. Each time you pull the yarn through, you've created another chain stitch.
Step 5: Maintain consistency As you're chaining, try to keep your tension consistent. This means pulling the yarn with roughly the same amount of force each time. Your chains should look roughly the same size as you go. Don't worry if they're not perfect—this comes with practice.
Building Your Practice Chain
Your first goal is to create a chain of 20 stitches. That's it. Twenty simple chain stitches. Once you've completed your chain of 20, take a moment to appreciate what you've done—you've created the foundation that every crochet project is built on.
Now, here's the secret to improvement: cut off your yarn, pull the end through the last loop to secure it, and start over. Make another chain of 20. Then another. Then another.
This repetition might feel boring, but it's where the magic happens. Each time you repeat the motion, your muscle memory is strengthening. Your hands are learning the rhythm. Your tension is becoming more consistent. By the time you've made five or six chains of 20 stitches, you'll notice a significant improvement in the evenness and size of your stitches.
Many experienced crocheters still warm up by making a practice chain before they start a new project. It's that important and that helpful.
What to Expect (And What's Normal)
Your chains look uneven? Completely normal. The first chain is always a bit wonky because you're learning the motion. By chain number 10, you'll already see improvement.
Your tension is too tight? This is the most common beginner challenge. Remember: the yarn should move smoothly through your fingers. You're guiding it, not strangling it. If your chains are hard to work into or feel stiff, try loosening your grip slightly.
Your tension is too loose? Your chains look sloppy and huge? You might be letting the yarn slip too easily. Try holding it slightly more firmly. Finding your personal rhythm takes practice.
Your stitches keep falling off your hook? Make sure your slip knot is snug enough to stay in place, and check that each new loop stays on your hook before you yarn over again.
The Practice Mindset
The most important thing to understand right now is that learning crochet is a process, not a destination. There's no "perfect" chain stitch to achieve. What matters is that you're building muscle memory, developing consistency, and starting to understand how yarn behaves on your hook.
Every single experienced crocheter—the ones making intricate blankets, gorgeous amigurumi, and complex patterns—started exactly where you are. They made wonky chains. They had to adjust their tension. They had moments of frustration mixed with moments of joy.
The difference between a beginner and an experienced crocheter isn't talent; it's practice. And you're beginning that practice right now.
Your Next Steps
Once you can make a comfortable chain of 20-30 stitches and your tension feels reasonably consistent, you're ready to learn your first actual stitch. But don't rush there. Spend a few days—or even a week—just practicing chains. Practice while watching TV. Practice while listening to music. Practice until the motion becomes automatic.
This foundation you're building right now? It's the difference between struggling through your first project and sailing through it with confidence.