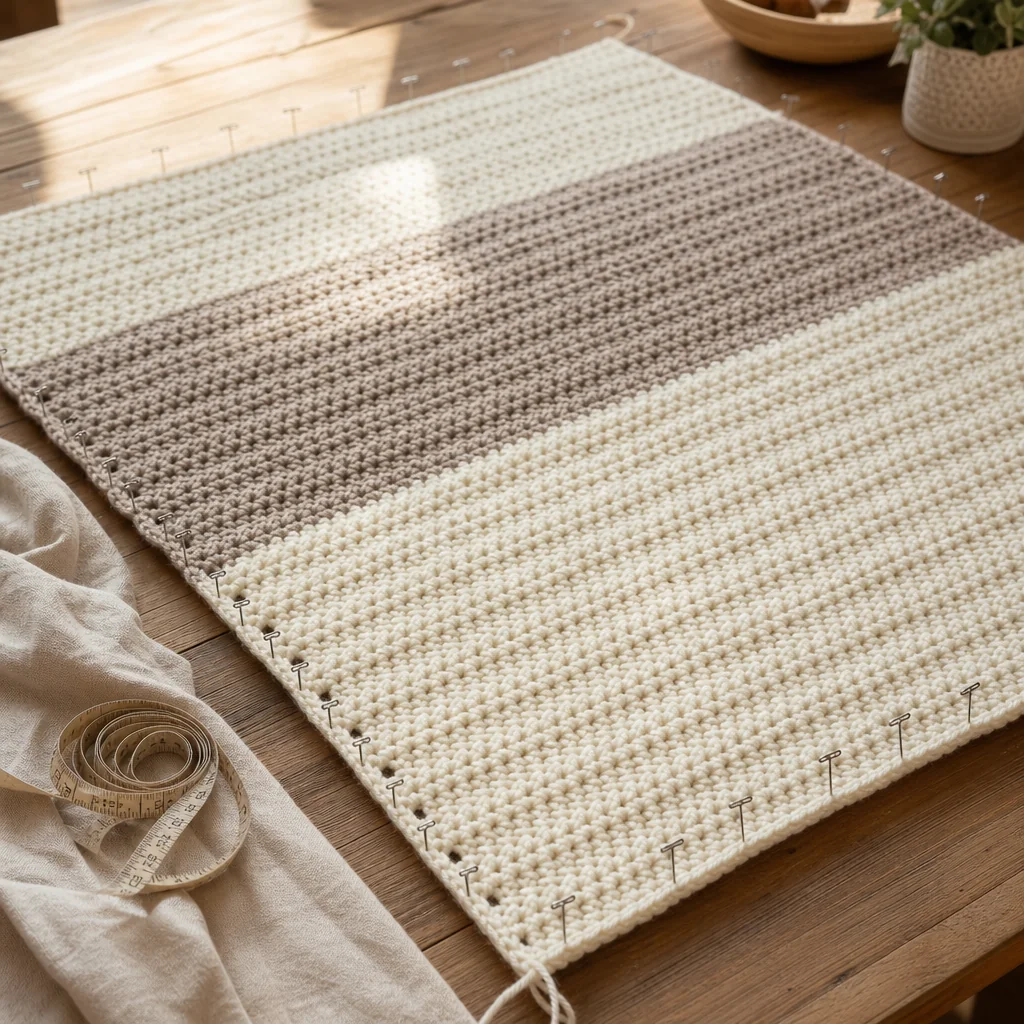
How to Block a Crochet Blanket So It Lies Flat
by Crochets Studio — A fiber artist and home crafter with over a decade of experience transforming yarn into cozy blankets and heirloom pieces, passionate about teaching finishing techniques that elevate handmade projects.
Blocking transforms a slightly wavy or curled blanket into a beautifully flat, professional-looking piece by relaxing the yarn fibers and setting your stitches into their intended shape. Whether you choose wet blocking for natural fibers or spray blocking for acrylics, this simple finishing technique makes a dramatic difference in how your blanket looks and drapes. With just pins, water, and patience, you can elevate any crochet blanket from homemade to heirloom-quality.
Why Blocking Matters for Blankets
You've spent hours crocheting your blanket, weaving in ends, and admiring your work—only to notice the edges curl inward, granny squares don't quite line up, or the whole piece looks lumpy instead of smooth. This is completely normal. Crochet fabric naturally has memory from being worked up in a specific direction, and different stitch types pull differently, creating waves and distortions.
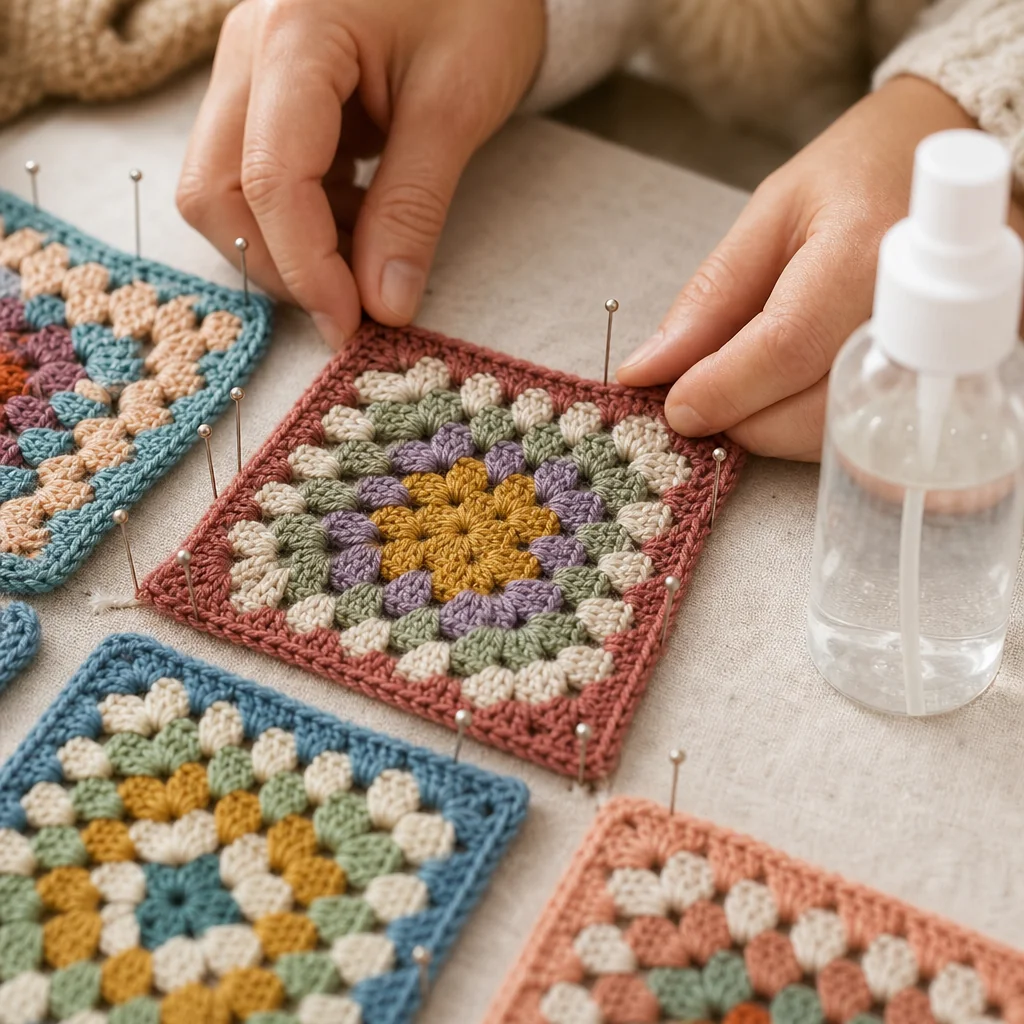
Blocking is the process of wetting or steaming your finished piece, reshaping it to the correct dimensions, and allowing it to dry in that position. The moisture temporarily softens the yarn fibers, letting them relax and settle into a new, even shape. Once dry, your blanket will hold that flat, polished form.
While blocking won't magically fix major gauge problems or dramatically uneven tension throughout the entire blanket, it will smooth out minor irregularities, open up lacy stitch patterns, straighten edges, and give your work a crisp, finished appearance. It's the difference between "I made this" and "I made this beautifully."
What You'll Need
Before you begin, gather these blocking supplies:
- Blocking mats or foam tiles: Interlocking foam squares designed for blocking, or a thick, clean towel laid on a flat surface like a bed, floor, or large table
- Rust-proof T-pins or blocking pins: Regular sewing pins can rust and stain your work when wet
- Spray bottle with clean water: For spray blocking method
- Basin or bathtub: For wet blocking method
- Tape measure: To check dimensions and ensure symmetry
- Optional: Blocking wires for perfectly straight edges on rectangular blankets
Choosing Your Blocking Method
The right blocking method depends on your yarn fiber content.
Wet Blocking (Best for Natural Fibers)
Wet blocking works beautifully for cotton, wool, bamboo, linen, and natural fiber blends. These fibers absorb water well and hold their new shape once dried. Wool is especially responsive to blocking because the fibers have scales that lock together when moistened and dried.
Spray Blocking (Best for Acrylic and Synthetics)
Acrylic yarn doesn't absorb water the same way natural fibers do, so full immersion wet blocking is less effective. Instead, spray blocking—misting the surface with water—provides enough moisture to relax the stitches without oversaturating synthetic fibers. This method also works well if you're short on time or working with a very large blanket that's difficult to soak.
Steam Blocking (Advanced)
Steam blocking uses a hot iron held above (not touching) the fabric to apply heat and moisture simultaneously. This method works for most fibers but requires care—too much heat can scorch or melt synthetic yarns. Since spray and wet blocking are safer and equally effective for blankets, we'll focus on those methods here.
Step-by-Step: Wet Blocking Method
Step 1: Fill Your Basin
Fill a clean bathtub, large basin, or sink with cool to lukewarm water. Avoid hot water, which can cause wool to felt or colors to bleed. You don't need soap or detergent unless you're also washing the blanket.
Step 2: Submerge the Blanket
Gently place your blanket into the water, pressing it down so it's fully submerged. Let it soak for 15 to 20 minutes. This gives the fibers time to absorb moisture and relax completely. Don't agitate or wring the blanket while it's soaking—this can cause felting in wool or stretching in cotton.
Step 3: Remove Excess Water
Carefully lift the blanket out of the water, supporting its weight to avoid stretching. Gently squeeze (don't twist or wring) to remove excess water. For large blankets, you can roll the blanket in a clean, dry towel and press down to absorb more moisture.
Step 4: Lay Flat on Blocking Surface
Spread your blocking mats or towels on a flat surface where the blanket can remain undisturbed for 24 to 48 hours. Lay the damp blanket on top, gently smoothing it out with your hands.
Step 5: Shape and Pin
Using your hands, gently stretch and shape the blanket into a rectangle or square, checking dimensions with your tape measure. Make sure opposite sides are equal lengths and corners form 90-degree angles.
Starting at one corner, insert a T-pin through the blanket edge and into the blocking mat. Move a few inches along the edge and pin again. Continue pinning every 2 to 4 inches around the entire perimeter, adjusting tension as you go to keep edges straight and corners square.
For granny square blankets, you can pin at each square's corner to emphasize the geometric pattern. For lacy stitch patterns, pin more frequently to open up the lacework.
Step 6: Air Dry Completely
Leave the blanket pinned until it's completely dry. Depending on humidity, yarn thickness, and room temperature, this can take anywhere from 24 hours to 3 days. Resist the urge to unpin early—the fibers need to be fully dry to set in their new shape.
Once dry, remove the pins and admire your beautifully flat blanket.
Step-by-Step: Spray Blocking Method
Step 1: Lay the Blanket Flat
Place your dry blanket on blocking mats or towels on a flat surface.
Step 2: Shape and Pin
Before adding any moisture, shape the blanket into the correct dimensions and pin it in place just as you would for wet blocking. This is easier to do while the blanket is still dry and manageable.
Step 3: Mist Thoroughly
Fill a clean spray bottle with cool water. Working in sections, mist the entire surface of the blanket until it's evenly damp—not soaking wet, but thoroughly moistened. Pay extra attention to areas that need the most correction, like curling edges or puckered seams.
Step 4: Press Gently
With clean hands, gently press down on the damp fabric to help the moisture penetrate the fibers. You can also pat it gently with a towel if you've sprayed too heavily.
Step 5: Air Dry Completely
As with wet blocking, leave the blanket pinned until fully dry. Acrylic typically dries faster than natural fibers, but still allow at least 24 hours.
Tips for Better Blocking Results
Measure as you pin: Keep your tape measure handy and check dimensions frequently. It's easy for a rectangle to become a trapezoid if you're not paying attention.
Use blocking wires for straight edges: Threading a long, flexible wire through the edge stitches before pinning creates a perfectly straight line and reduces the number of pins needed.
Block in sections for large blankets: If your blanket is enormous, you can block it in halves or quarters, overlapping the blocked sections slightly.
Don't skip blocking for granny squares: Even if individual squares were blocked before joining, the whole blanket benefits from a final block to even out seams and unify the fabric.
Consider the final use: If your blanket will be draped over furniture or used on a bed, you may want a slightly relaxed block rather than pinning it aggressively tight.
Common Blocking Mistakes to Avoid
Over-stretching is the most common error. Blocking should reveal your stitches' natural shape, not distort them. If you pull too hard, you'll thin out the fabric and create a limp, overstretched blanket that may not hold its shape after unpinning.
Using regular pins instead of rust-proof pins can leave rust stains, especially on light-colored yarns. Always use T-pins or blocking pins specifically designed for wet work.
Removing pins too early means your blanket will revert to its original shape. Patience is essential—wait until the fabric is bone-dry.
When Blocking Won't Help
Blocking is a finishing technique, not a fix for fundamental construction issues. If your blanket has wildly inconsistent gauge throughout (some sections much tighter or looser than others), blocking will improve the appearance but won't make it perfectly even. Similarly, if you've accidentally skipped stitches or added extra stitches creating visible gaps or bumps, blocking won't repair those errors.
For blankets made entirely of thick, stiff acrylic yarn, blocking provides minimal benefit since synthetic fibers have less memory and elasticity than natural fibers. However, it still helps somewhat with curling edges.
Maintaining Your Blocked Blanket
After blocking, your blanket will stay flat through normal use. However, washing it will relax the fibers again, so you may want to re-block after laundering, especially for heirloom or display pieces.
For everyday blankets, a quick steam with a handheld steamer (held a few inches away from the surface) can refresh the fabric between washes without a full re-block.
Store blocked blankets folded rather than stuffed into bags, and avoid placing heavy items on top that could create permanent creases.
Ready to Block Your Next Project?
Now that you understand how blocking works and why it matters, you'll never skip this crucial finishing step again. The transformation from lumpy and curled to smooth and flat is immediate and satisfying—it's the moment your blanket truly becomes a finished piece you're proud to display or gift.
Whether you're working on a simple single-crochet baby blanket or an intricate granny square afghan, blocking is the final touch that elevates your work from handmade to hand-crafted. Take the time, use the right method for your yarn, and watch your crochet blanket transform into something truly beautiful.