Why Is My Crochet Curling or Wavy? Tension Troubleshooting Guide
by Crochets Studio — Written by a fiber artist who spent years fighting curling scarves and wavy blankets before finally mastering tension control. Now teaches other crocheters to recognize and fix tension problems before they waste hours of work.
Crochet fabric that won't lie flat is one of the most common frustrations for crocheters at every skill level. Whether your work curls up at the edges like a scroll or creates rippling waves across the surface, the problem stems from tension inconsistency—and with the right approach, you can train your hands to create perfectly flat, even fabric every time.
Understanding the Problem: Curling vs. Waving
Before you can fix tension problems, you need to identify which type you're dealing with. Curling and waving look different and have opposite causes, so the solutions are different too.
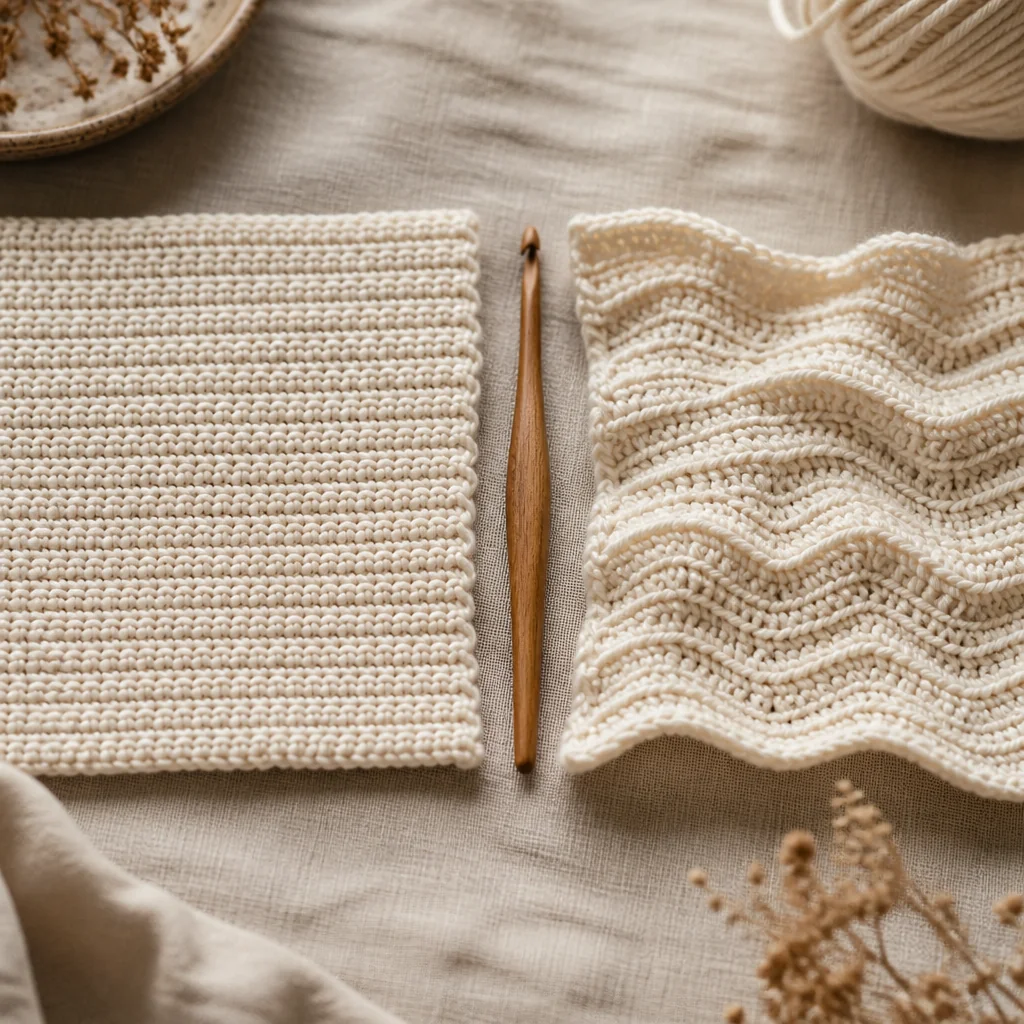
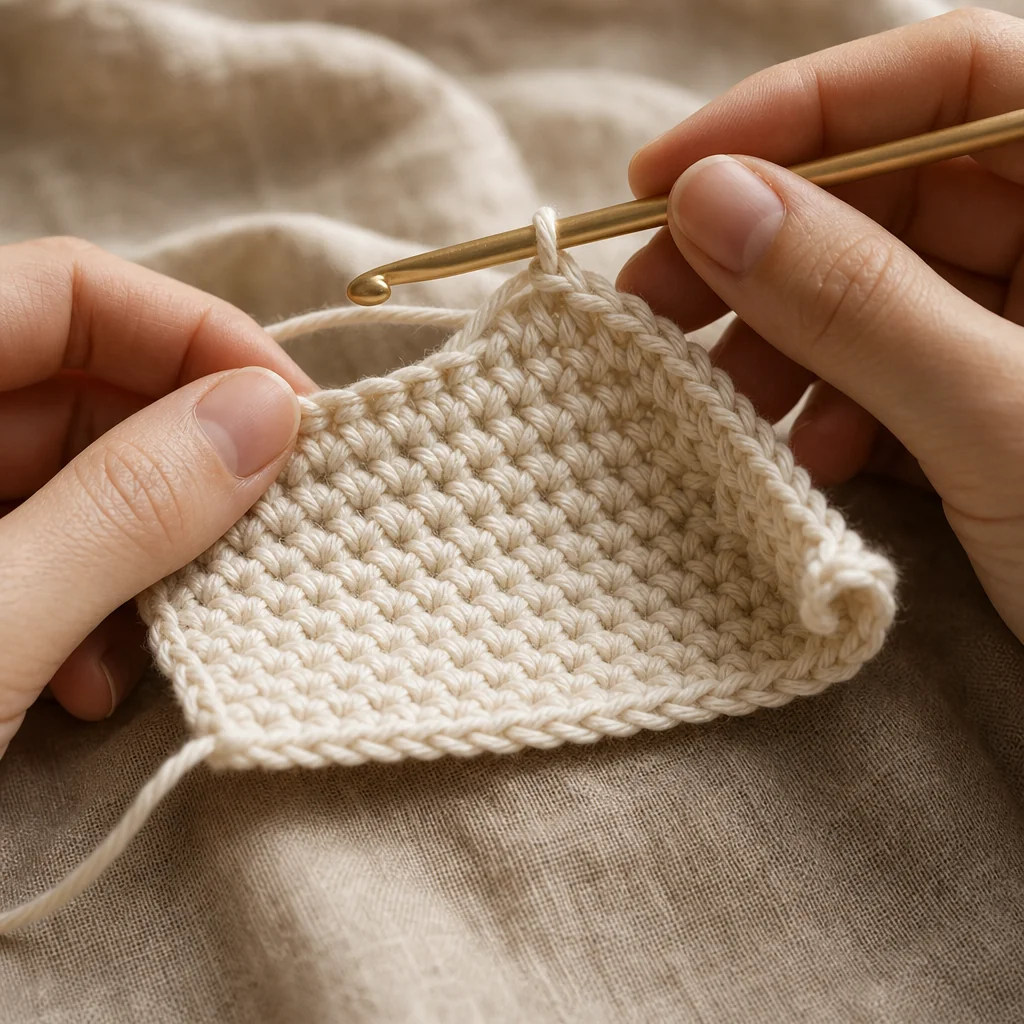
Curling happens when the edges of your fabric roll inward toward the wrong side. The fabric wants to form a tube or cylinder shape. This is most noticeable in rectangular projects like scarves, dishcloths, or blanket panels.
Waving (also called ruffling) happens when the fabric develops ripples or waves that push outward. The fabric has too much material and buckles rather than lying flat. You'll see this as undulating hills and valleys across your work.
Both problems make your finished project look unprofessional and can affect how garments fit or how blankets drape.
Problem: Curling Edges
The Root Cause
Curling edges mean your stitches are too tight. When you pull your working yarn too firmly—especially at the beginning or end of rows—you're essentially shrinking the fabric. Each stitch becomes compressed, and the cumulative effect pulls the entire edge inward.
This problem is particularly common with:
- Single crochet projects: Single crochet creates the densest, least flexible fabric of all basic stitches
- Foundation chains: A tight foundation chain acts like a drawstring, cinching the entire first edge
- Turning chains: Overly tight turning chains at row ends create tension points that pull the edges inward
- Nervous tension: When you're focused or anxious, you unconsciously grip the yarn tighter
Step-by-Step Fixes for Curling
-
Assess your foundation chain first: Pick up your work and examine the starting chain. Can you easily insert your hook through each chain stitch, or do you have to force it? If it's hard to work into, your chain is too tight.
-
Increase your hook size by 0.5-1mm: This is the fastest fix for tight tension. If you're using a 4mm hook, try a 4.5mm or 5mm. Test a small swatch before committing to a full project.
-
Consciously relax your yarn hand: Pay attention to how you hold your working yarn. Your fingers should guide the yarn, not strangle it. The yarn should flow smoothly through your fingers with gentle resistance, not require tugging.
-
Practice the "loose chain" technique: When making your foundation chain, leave a visible gap between each chain stitch as you form it. It will look too loose, but it will tighten up as you work the first row into it.
-
Check your turning chains: At the end of each row, your turning chain should match the height of the stitches in that row. Count it carefully and don't pull it tight.
-
Work your first and last stitches looser: These edge stitches bear the most stress. When you work the first stitch after your turning chain and the last stitch before turning, deliberately pull less on the yarn.
Testing Your Fix
After implementing changes, work a 4-5 inch square swatch. Block it lightly by pinning it flat to a blocking board or towel. If the edges stay flat when you remove the pins, your tension is correct. If they curl again, you need to go up another hook size or consciously loosen your grip more.
Problem: Wavy or Ruffled Fabric
The Root Cause
Wavy fabric means you have too much material in your rows. This happens for two reasons:
Reason 1: Tension too loose. When your stitches are too loose, each one takes up more horizontal space. Over multiple rows, this excess width accumulates and the fabric has to buckle to fit.
Reason 2: Too many stitches. This is actually more common than loose tension. You're accidentally adding extra stitches somewhere in your rows, creating genuine excess fabric. Common culprits:
- Working into the turning chain space AND the first stitch
- Working two stitches into one stitch by mistake
- Miscounting and working extra stitches into chain spaces
- Not skipping stitches when a pattern requires it
Step-by-Step Fixes for Waving
-
Count your stitches religiously: At the end of every single row, count all your stitches. Compare to your starting number. If you consistently have more stitches than you should, you're adding extras somewhere.
-
Identify where extras appear: Work slowly through one row, placing a stitch marker after every 10 stitches. If you consistently end up with 11 or 12 stitches in a section, watch that section carefully on the next row to catch where the extra appears.
-
Mark your turning chains: Use a different color stitch marker or safety pin to mark your turning chain at the end of each row. This prevents you from accidentally working into the turning chain space when you shouldn't.
-
Reduce your hook size by 0.5mm: If your stitch count is correct but the fabric still waves, your tension is too loose. A smaller hook forces tighter stitches.
-
Practice consistent yarn tension: Hold your yarn so it maintains steady resistance as you pull through loops. The resistance should feel the same for every single stitch.
-
Learn to recognize the "last stitch": The last stitch of a row often hides under the turning chain. Practice identifying it by feel. It should have both loops visible on top and a vertical post below.
Testing Your Fix
Work a new swatch with your corrections. After completing it, measure the width at the beginning, middle, and end. All three measurements should be within 1-2mm of each other. If the width increases noticeably, you're still adding stitches or your tension is still too loose.
Advanced Troubleshooting
When Only One Edge Curls or Waves
If only your starting edge curls, your foundation chain is too tight—redo it with a larger hook or looser tension. If only your ending edge waves, you're likely adding stitches toward the end of your project as you tire or lose focus.
When the Problem Appears Mid-Project
Tension often changes when you:
- Switch crochet positions (couch to table, for example)
- Crochet tired or distracted
- Take a long break and return to the project
- Change yarn balls (even in the same dye lot, yarn tension can vary slightly)
Pay extra attention to maintaining consistent tension during these transitions.
Stitch Type Matters
Different stitches have different natural tendencies:
- Single crochet: Prone to curling due to density
- Half double crochet: More balanced, less prone to problems
- Double crochet: Can wave if tension is inconsistent
- Treble crochet and taller: Very prone to waving because of stitch height
Adjust your baseline tension expectations based on the stitch you're using.
Prevention Strategies
Build Better Habits
- Warm up with a practice swatch before starting your actual project. This lets your hands settle into consistent tension.
- Take breaks every 30-45 minutes to stretch your hands and reset your grip.
- Crochet in good light so you can clearly see each stitch—this reduces stress and unconscious tightening.
- Maintain good posture to keep your shoulders and arms relaxed.
Use Tools to Your Advantage
- Stitch markers help you track stitch counts and identify problem areas
- Row counters prevent lost count and the resulting stitch count errors
- Multiple hook sizes let you test and find the perfect size for your personal tension
- Blocking tools can train finished fabric to lie flat, though they won't fix severe tension problems
When Blocking Helps (and When It Doesn't)
Blocking—wetting or steaming your finished piece and pinning it flat to dry—can help minor tension issues. It works best for:
- Slight edge curling in natural fibers (wool, cotton, linen)
- Evening out small tension variations
- Training fabric to hold its blocked shape
Blocking cannot fix:
- Severe curling from very tight tension
- Waves caused by too many stitches (the extra stitches are still there)
- Acrylic yarn problems (acrylic doesn't respond well to blocking)
Fix the tension problem first, then block to refine.
Moving Forward
Tension consistency is a skill that develops over time. Every crocheter started with uneven tension—it's part of the learning process. The key is recognizing problems early, understanding their causes, and making corrections before you've invested hours in a project.
Practice with small swatches in different stitch types. Pay attention to how your hands feel when you achieve flat, even fabric. That muscle memory will carry over to your actual projects and eventually become automatic.
Your crochet journey includes mastering not just stitches and patterns, but also the feel of proper tension in your hands. With focused practice and the troubleshooting strategies above, you'll create beautifully flat fabric that showcases your work exactly as intended.
Next step
Calculate Your Gauge