Tapestry Crochet: How to Read a Colorwork Chart
by Crochets Studio — A lifelong fibre artist based in Canada who learned tapestry crochet from charted Wayuu mochila patterns and now designs geometric accessories from a small studio surrounded by far too many yarn cakes.
A colorwork chart is a visual grid where each square equals one stitch, and colors or symbols indicate which yarn to use at each point. Reading these charts becomes intuitive once you understand row direction, legend conventions, and how to carry unused yarn inside your stitches. This guide walks you through every element of chart reading so you can create bold, geometric tapestry crochet designs with precision.
What Is a Colorwork Chart?
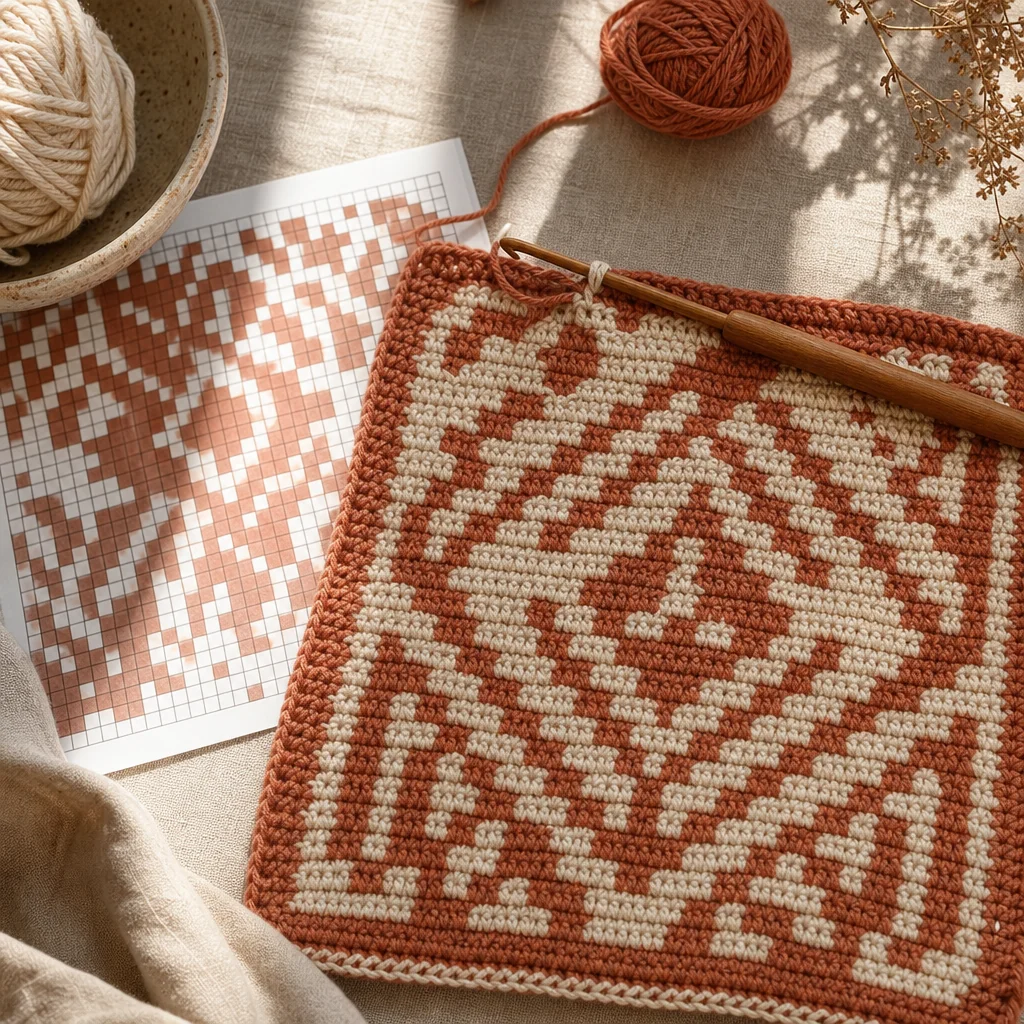
A colorwork chart is a visual representation of your tapestry crochet pattern laid out on a grid. Instead of written row-by-row instructions telling you to switch colors at specific stitch counts, the chart lets you see the entire design at a glance. Each cell in the grid corresponds to exactly one stitch, and its color or symbol tells you which yarn to work with. Think of it as a pixel art blueprint for your crochet project.
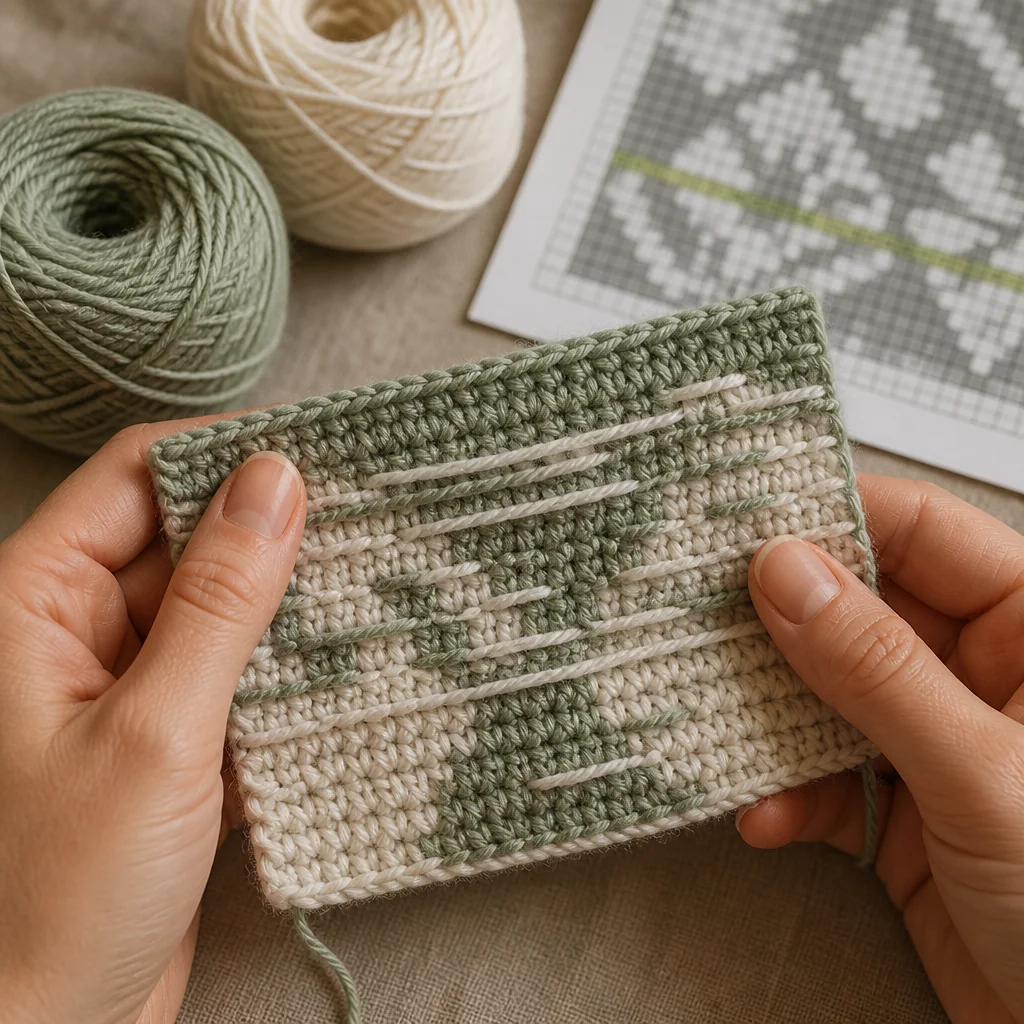
Tapestry crochet differs from other colorwork methods because you carry unused yarns inside your stitches rather than cutting and rejoining them. This means the chart isn't just showing you a pretty picture—it's giving you real-time instructions for every single stitch in your project.
Materials You'll Need
- A printed or digital colorwork chart (start with a simple two-color geometric design)
- Worsted-weight cotton yarn in two contrasting colors
- A crochet hook one size smaller than recommended for your yarn (this creates a tighter fabric that hides carried strands)
- Stitch markers
- A magnetic board or sticky highlighter tape for row tracking
- A row counter (manual or digital)
- Scissors and a tapestry needle
Understanding the Grid Structure
Rows and Columns
The grid is organized so that each horizontal line of squares represents one row of crochet, and each vertical column represents one stitch position. The total number of columns equals your stitch count, and the total number of rows equals how many rows you'll crochet.
Reading Direction
This is where many crocheters get tripped up. Charts mirror the way your fabric is constructed:
- Bottom to top: You always start reading from the bottom row of the chart, because that's your first row of crochet.
- Right-side rows (odd rows): Read from right to left. This mirrors the direction you're actually crocheting when the right side faces you.
- Wrong-side rows (even rows): Read from left to right. When you turn your work, you're now moving in the opposite direction.
If you're working in the round (common for tapestry crochet bags and baskets), every row reads from right to left because you never turn your work.
Row Numbers and Arrows
Well-designed charts include row numbers along the sides. Odd numbers typically appear on the right edge, and even numbers on the left. Some charts also include small directional arrows at the start of each row so you never lose track of which direction to read.
Decoding Color Keys and Symbols
Colored Squares
The most straightforward charts use filled colored squares. A blue square means work that stitch in blue yarn. A white square means work that stitch in white. Simple and visual.
Symbols and Letters
Black-and-white charts (common in printed books and PDFs) replace colors with symbols. You might see:
- An empty square for Color A
- A square with an X for Color B
- A square with a dot for Color C
- Letters like A, B, C inside squares
Always check the legend before starting. Never assume what a symbol means based on another designer's conventions.
Multi-Color Legends
For designs with three or more colors, the legend becomes critical. Some designers place it at the bottom of the chart, others at the side. Print it out separately if needed and keep it visible at all times.
How Yarn Carrying Works with the Chart
The Principle
In tapestry crochet, you never drop or cut your unused color. Instead, you lay the unused strand along the top of the previous row and crochet over it, trapping it inside your new stitches. The chart tells you which color is the working yarn (the one forming the visible stitch) and which color is the carried yarn (hidden inside).
Reading the Chart for Color Changes
When you see a color change coming on the chart, you need to switch yarns during the last yarn-over of the stitch before the change. This means you're always looking one stitch ahead on the chart. Glancing ahead becomes second nature with practice.
Tension and Fabric Density
Carried yarn affects your tension. If you carry too loosely, the strand shows through on the front. If you carry too tightly, your fabric puckers. Aim for consistent tension throughout, keeping carried strands snug but not pulling.
Step-by-Step: Reading Your First Chart
Step 1: Analyze the Chart Before You Start
Look at the full chart. Note the dimensions (stitch count and row count), number of colors, and overall pattern. Identify any repeating sections—many geometric designs have a repeat unit that tiles across the row.
Step 2: Set Up Your Row Tracker
Place your magnetic board strip or highlighter tape directly above Row 1 on the chart. This highlights the row you're working and blocks the rows above so you don't accidentally skip ahead.
Step 3: Chain Your Foundation
Chain the number of stitches indicated by the chart width, plus one turning chain if working flat. Use your main color (typically Color A).
Step 4: Begin Row 1 (Right to Left)
Starting from the right edge of the chart's bottom row, work one single crochet for each square, using the color indicated. Carry the unused color inside your stitches throughout.
Step 5: Switch Colors When Indicated
When the chart shows a color change at the next square, complete your current stitch until the final yarn-over, then pull through with the new color. The carried color becomes the working color, and vice versa.
Step 6: Turn and Read Row 2 (Left to Right)
Chain one, turn your work. Now read the second row from left to right on the chart. Continue crocheting over the unused color as before.
Step 7: Move Your Row Tracker
After completing each row, slide your tracker up one row on the chart. Count your stitches at the end of every row to make sure you haven't gained or lost any.
Step 8: Continue Until Complete
Repeat the process, alternating reading direction for flat work, until you reach the top of the chart. Your completed fabric should match the chart design.
Common Mistakes and How to Avoid Them
Reading the Wrong Direction
If your pattern appears mirrored or offset, you're likely reading a row in the wrong direction. Double-check your row number and whether it's odd or even.
Losing Stitch Count
The most common issue in tapestry crochet. Place a stitch marker every 10 stitches along your row so you can catch miscounts quickly without frogging the entire row.
Color Bleed-Through
If the carried yarn peeks through the front of your work, try going down one hook size for a denser fabric. Also ensure you're crocheting over the carried strand, not under it.
Forgetting to Switch Early
Remember: the color change happens during the last yarn-over of the stitch before the new color appears on the chart. If your color changes seem off by one stitch, this is likely the issue.
Tips for Advancing Your Chart-Reading Skills
- Start small: A two-color coaster or mug cozy lets you practice without committing to a large project.
- Use graph paper: Sketch your own simple designs to internalize how charts translate to stitches.
- Photocopy and mark up: Cross out completed rows with a pencil so you always know where you are.
- Try working in the round: Bags and baskets in the round eliminate the direction-change confusion entirely since every row reads right to left.
- Graduate to three colors: Once two-color charts feel comfortable, add a third color. The principle is identical—you just carry two strands inside your stitches.
From Chart to Finished Piece
With consistent practice, chart reading stops being a translation exercise and becomes instinctive. You'll start seeing the pattern emerge in your fabric and naturally know which color comes next. Tapestry crochet charts unlock an entire category of projects—geometric pouches, pictorial wall hangings, patterned cushions, and bold accessories—that simply aren't possible with written instructions alone.
The key is patience with yourself during the learning curve. Your first chart project might take twice as long as you expect, and that's perfectly normal. By your third project, you'll be reading ahead and switching colors without conscious effort.